Cookie Cutter Sandwiches for Kids (The Lunch That Makes Any Tuesday Special)

You Might Also Love: Baking Cookies with Kids, Beach Dirt Cups, Backyard Picnic, Cereal Necklace Craft
This post contains affiliate links — see our disclosure.
Lunch is lunch. Most days it doesn’t have to be more than that.
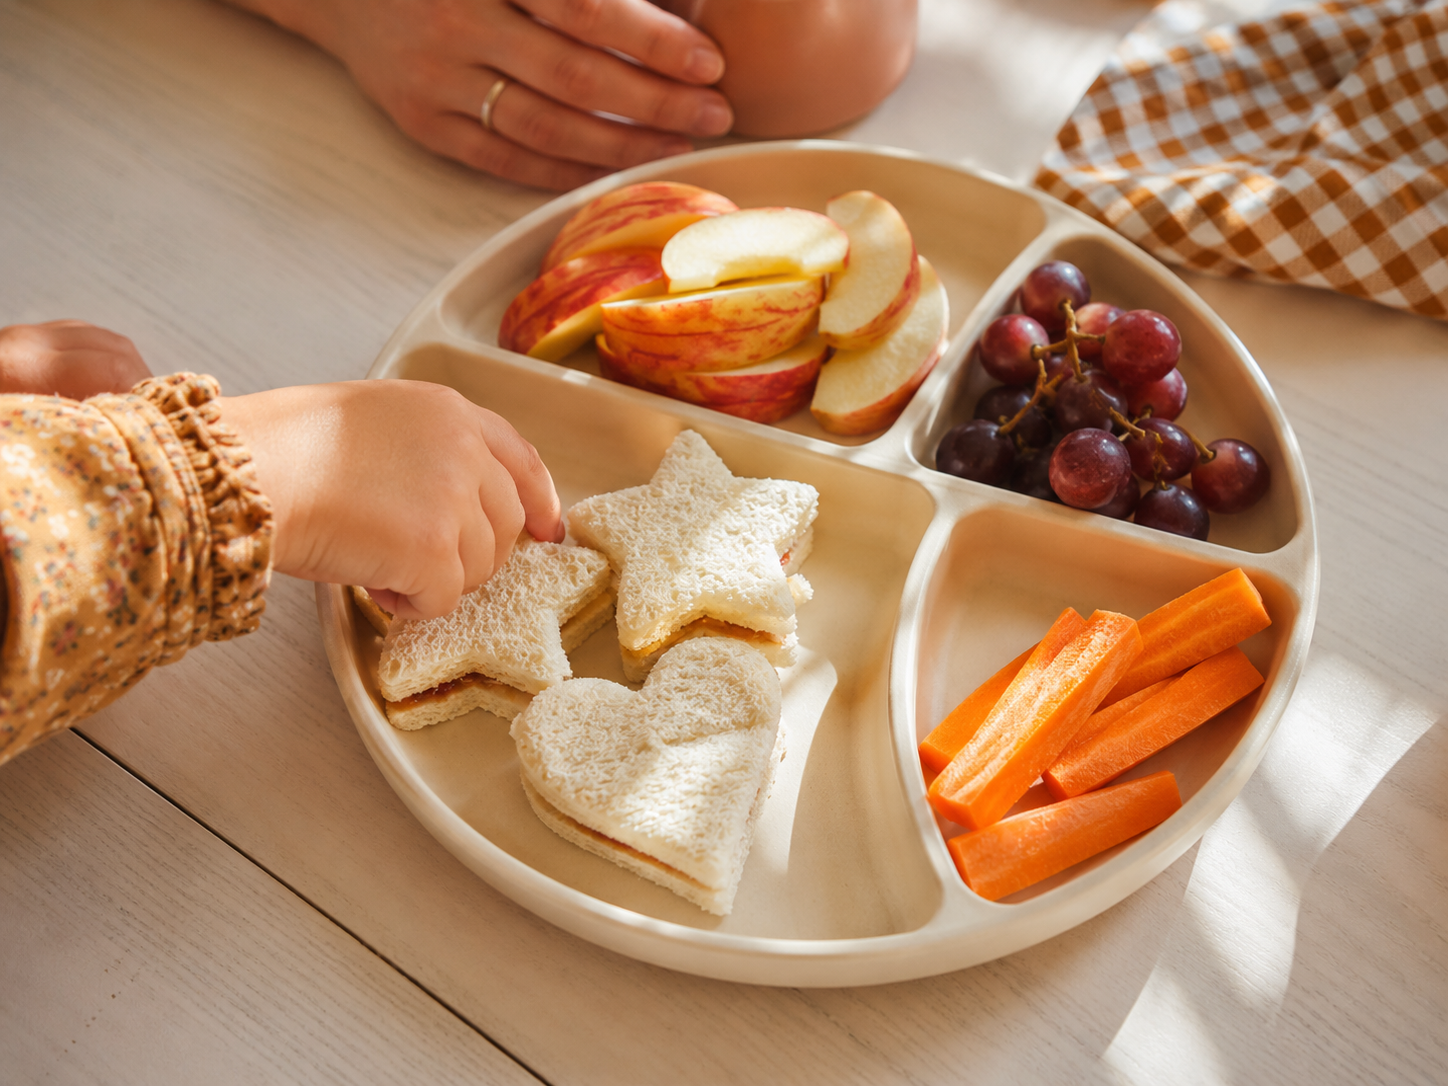
But every now and then, you cut a sandwich into the shape of a star — and a four-year-old looks at you like you just performed actual magic.
Cookie cutter sandwiches taste identical to a regular sandwich. But something about the shape — the fact that someone took a moment to make it look different — changes the whole experience of eating it. It becomes an event.
And unlike most “special lunch” ideas, this one takes about five minutes and requires nothing you don’t already have.
⏱ Setup Time: 5 minutes | 👶 Ages: All ages | 🧹 Mess Level: Low | 💰 Cost: $
What You’ll Need
Optional: toothpick flag picks for extra flair
Bread (any kind)
Peanut butter and jam (or cream cheese, turkey + cheese, whatever they like)
Cookie cutters — stars, hearts, animals, dinosaurs, any shape
Apple slices, grapes, or other sides
🔗 Cookie cutter set — sandwich shapes, variety pack
🔗 Kids’ divided lunch plate
🔗 Bento lunch box with dividers
Setting It Up

- Make the sandwich normally — peanut butter and jam, or any filling they like
- Press a cookie cutter firmly straight down through both slices
- Remove the shape and place on the plate
- Arrange sides around it
- Optional: add a flag pick or toothpick into the sandwich
The leftover bread scraps: crumble for birds outside, make croutons for soup, or cut into “snack bites” with extra peanut butter. Nothing wasted.
Making It an Activity (Not Just a Lunch Upgrade)
If you want to extend this from a quick lunch upgrade into a real project, set up a sandwich station:
- Put out bread, fillings, and cookie cutters on the table or a low counter
- Let kids build and cut their own sandwich
- They choose the filling, press the cutter, arrange their own plate
Even a 2-year-old can press a cookie cutter into soft bread with some help. Give them ownership over the whole process.

The Character Lunch
This is where it gets fun. Once the sandwich shape is on the plate, ask: “Does this star have a name? Where is it going today? What adventure has it been on?”
Before eating, they narrate the story of the plate. Then they eat the characters one by one.
It sounds a little silly. It takes two extra minutes. Kids love it unconditionally.
Kid Jobs & Adult Tips
| 👶 Kid Jobs | 💡 Adult Tips |
|---|---|
| Spreading filling with a kid-safe spreader | Press firmly and straight down — wiggling the cutter sideways tears the bread |
| Pressing the cookie cutter | Softer sandwich bread cuts most cleanly — dense or crusty bread is harder |
| Arranging their own plate | Make different shapes for different kids — let them choose their shape before cutting |
| Naming the sandwich characters | Grandma tip: keep a small set of cookie cutters in the kitchen just for this. The ritual of “picking your shape” becomes part of the visit. |
Creative Variations
Pancake shapes: Use the same cutters on pancakes at breakfast. Christmas tree pancakes in December. Heart pancakes in February.
Quesadilla shapes: Press cutter into a warm quesadilla for a crispy shaped version.
Cheese shapes: Small cutters on sliced cheese for crackers and fruit plates.
Fruit shapes: Use cutters on watermelon, honeydew, or cantaloupe slices. Beautiful on any plate, makes fruit feel more like a treat.
Themed lunches: Ocean (fish + starfish shapes), garden (flower + leaf), holiday (pumpkin in October, tree in December).

💛 Memory-Making Prompt
While eating, ask: “If your sandwich was a character in a movie, who would it be? What would the movie be about?”
Or simply: “If you could have your dream lunch — anything at all — what would be on the plate?”
Write down the answer. A six-year-old who says “goldfish crackers, a strawberry milkshake, and a taco” is telling you something true about who they are right now. You’ll want to remember it.
Frequently Asked Questions
How do you make cookie cutter sandwiches?
Make a sandwich as you normally would, then press a cookie cutter firmly straight down through both slices of bread. Remove the cutter and lift the shaped sandwich onto the plate. The cleanest cuts come from pressing straight down without wiggling. Soft sandwich bread works better than dense or crusty bread.
What cookie cutters work best for sandwiches?
Medium-sized cookie cutters (about 3 inches) work best for sandwiches — large enough to give a generous sandwich portion while small enough to make a clean cut. Stars, hearts, dinosaurs, and simple animals are popular choices. Metal cutters give cleaner edges than plastic for thicker bread.
What do you do with the bread scraps from cookie cutter sandwiches?
Leftover bread scraps from cookie cutter sandwiches can be cut into small “snack bites” with peanut butter, crumbled and scattered outside for birds, toasted for croutons to add to soup, or used to make mini sandwiches for stuffed animals at a pretend picnic.
Are cookie cutter sandwiches good for picky eaters?
Yes — the shape change is often enough to make a familiar food feel exciting to picky eaters. Many parents report that kids who normally refuse sandwiches will eat them happily when they’re cut into fun shapes. Letting kids choose their own shape before you cut also increases buy-in.
Can toddlers help make cookie cutter sandwiches?
Yes. A 2-year-old can press a cookie cutter into soft bread with light adult assistance and can use a kid-safe spreader to help with the filling. Most of the process is hands-on and safe for toddlers — set up the sandwich station at a low counter or table so they can reach comfortably.
📌 Save This for Later!
Pin this so you always have an easy, fun lunch idea when you need one.
🎁 Want 9 More Ideas Like This?
Download the free Connecting with Your Kids Starter Guide — 10 simple activities with supply lists and step-by-step instructions for every age.
Follow along at @doublebatchlife on Instagram — simple, affordable activity ideas every week.
Written by Double Batch | doublebatchlife.com | Last updated: June 2026



5 Comments
Comments are closed.